 Mid-November, 2020, I was honored to be recruited by my Vicereine (ceremonial head of the NYC-area SCA group) to help make regalia for the newest inductee into our Order of the Sea Urchin of Østgarðr. The Sea Urchin is for youth who excel in service, arts or martial accomplishment — “and” in the case of this extremely deserving young person.
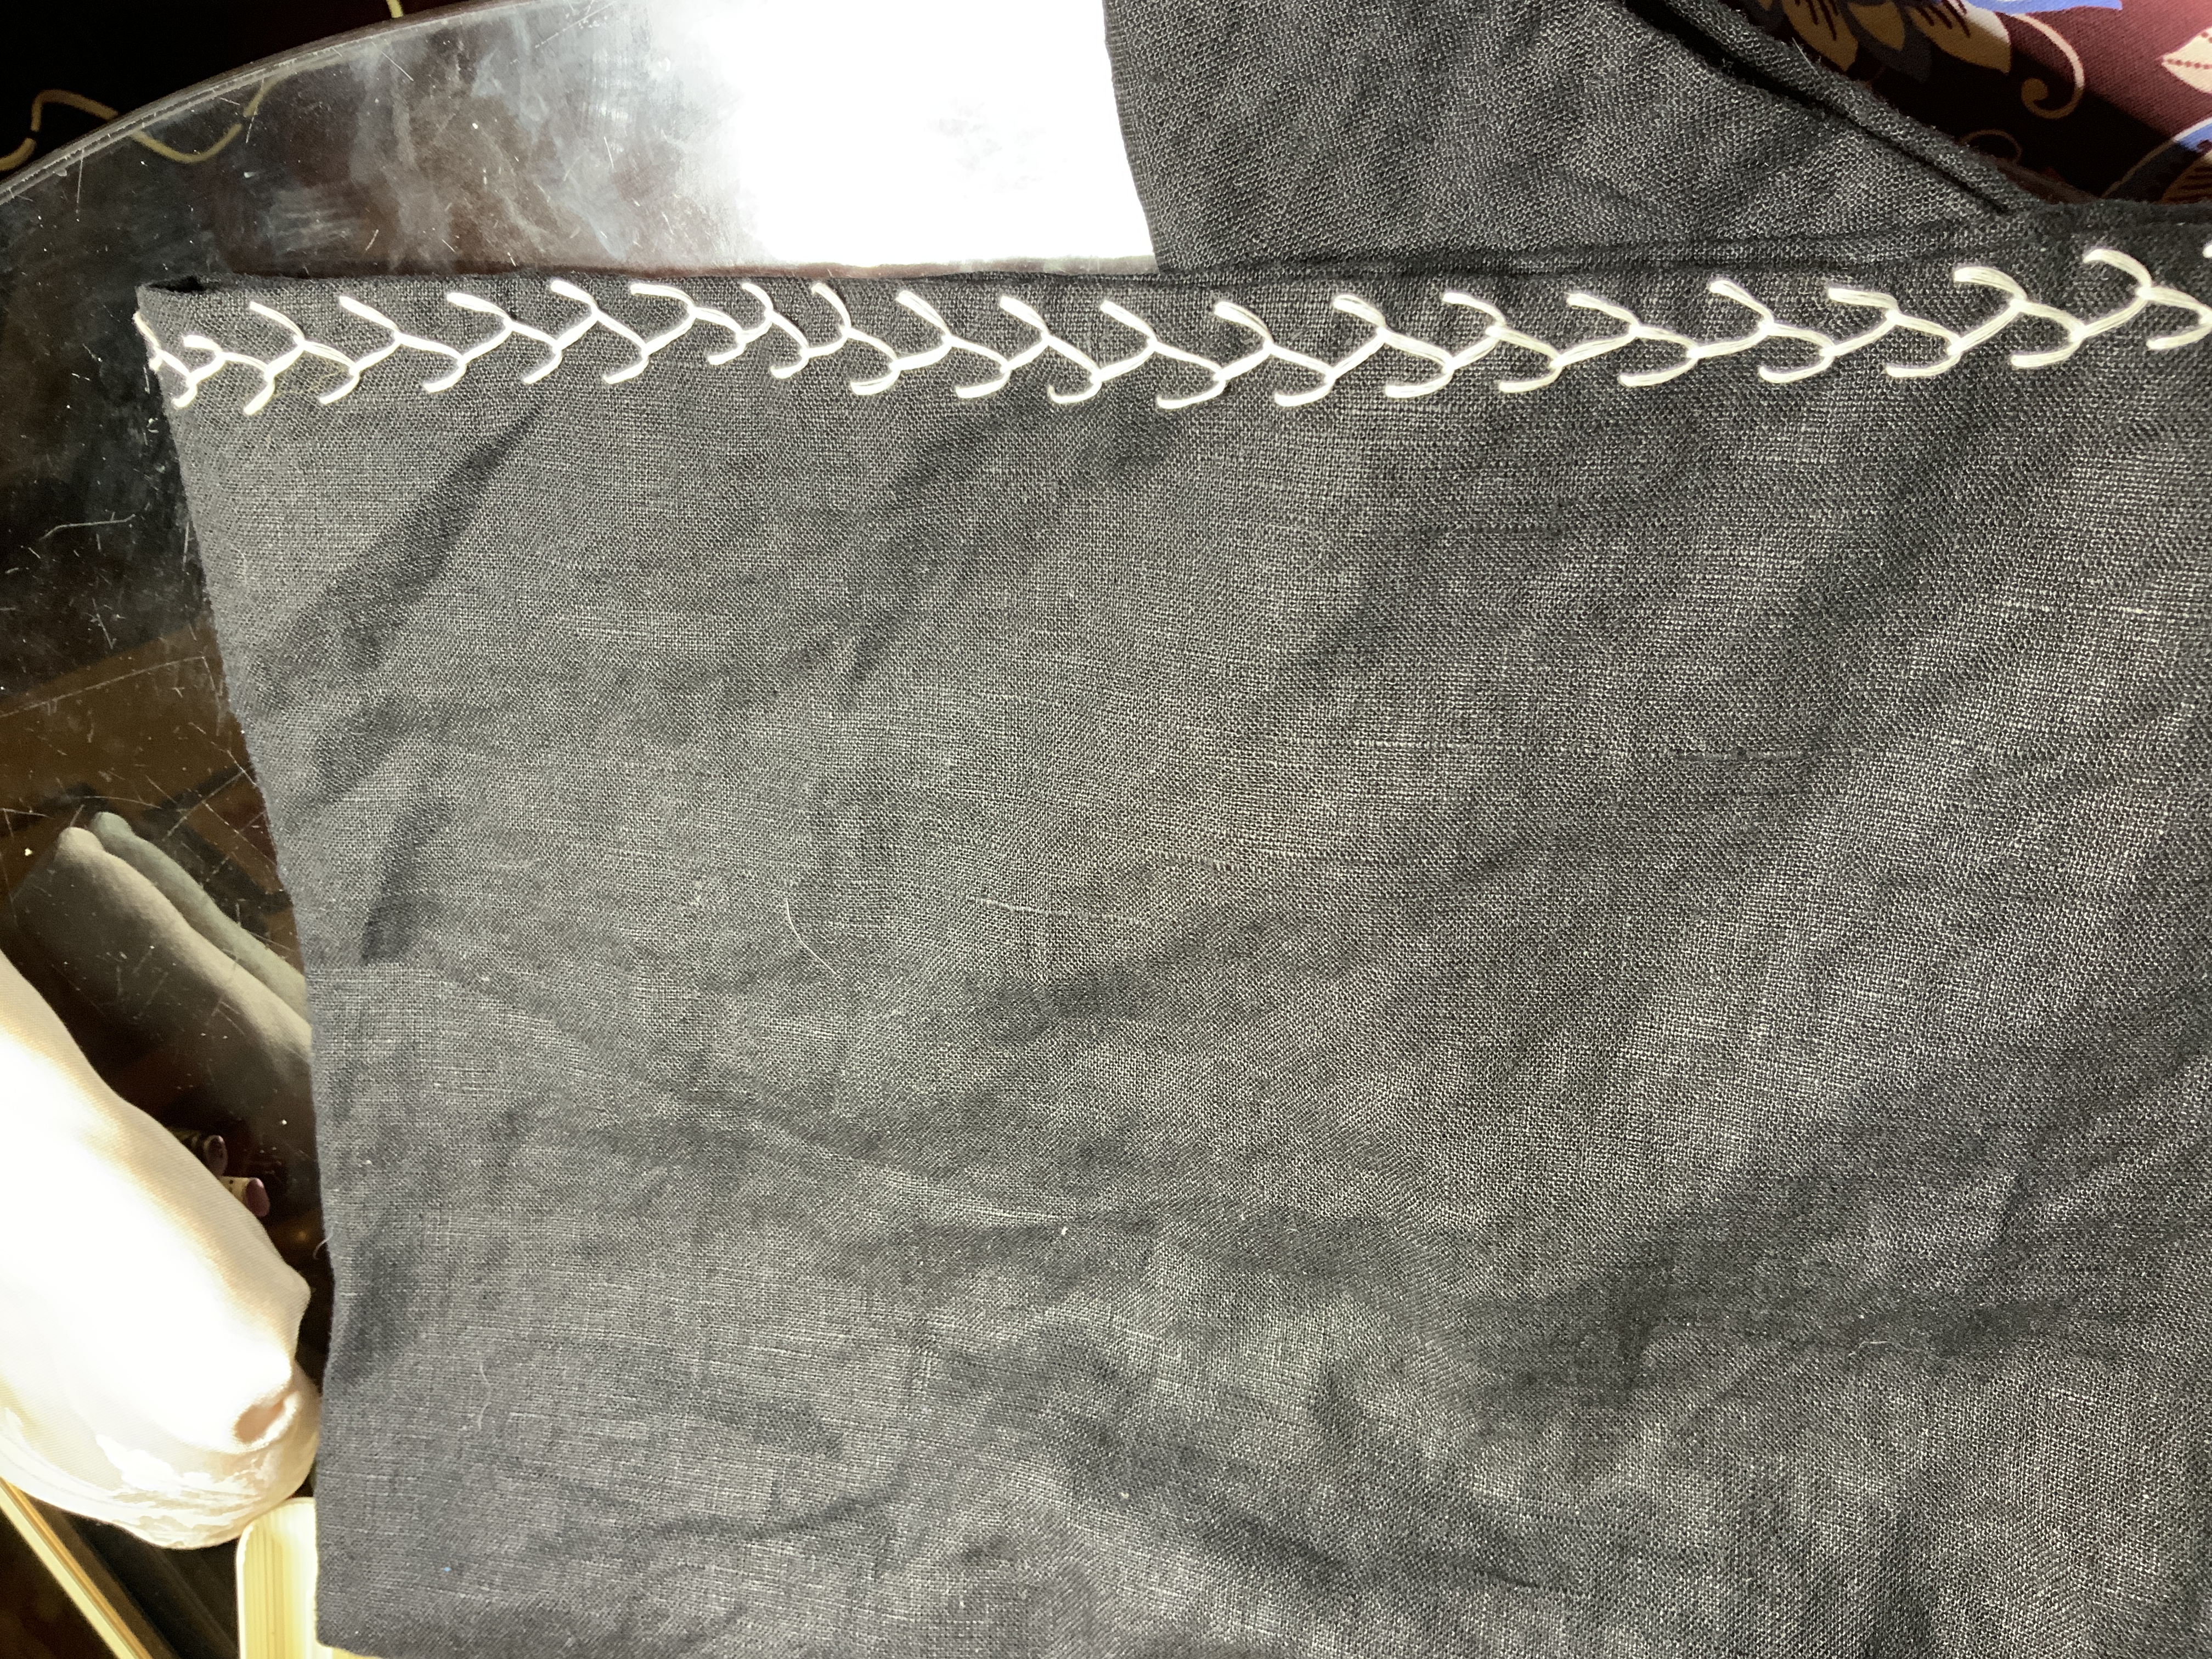
The black linen hood was hand-sewn by Berakha bat Mira v’Shlomo, using a rectangular construction technique. I felt a weighty responsibility, decorating her exquisite needlework.
For machine wash-ability and general hardiness, I chose DMC 6-strand cotton embroidery floss. Also, I have All The Colors, which under the circumstances (hood to be awarded in 3 weeks, shopping opportunities limited & slow due to pandemic restrictions) was a significant win.
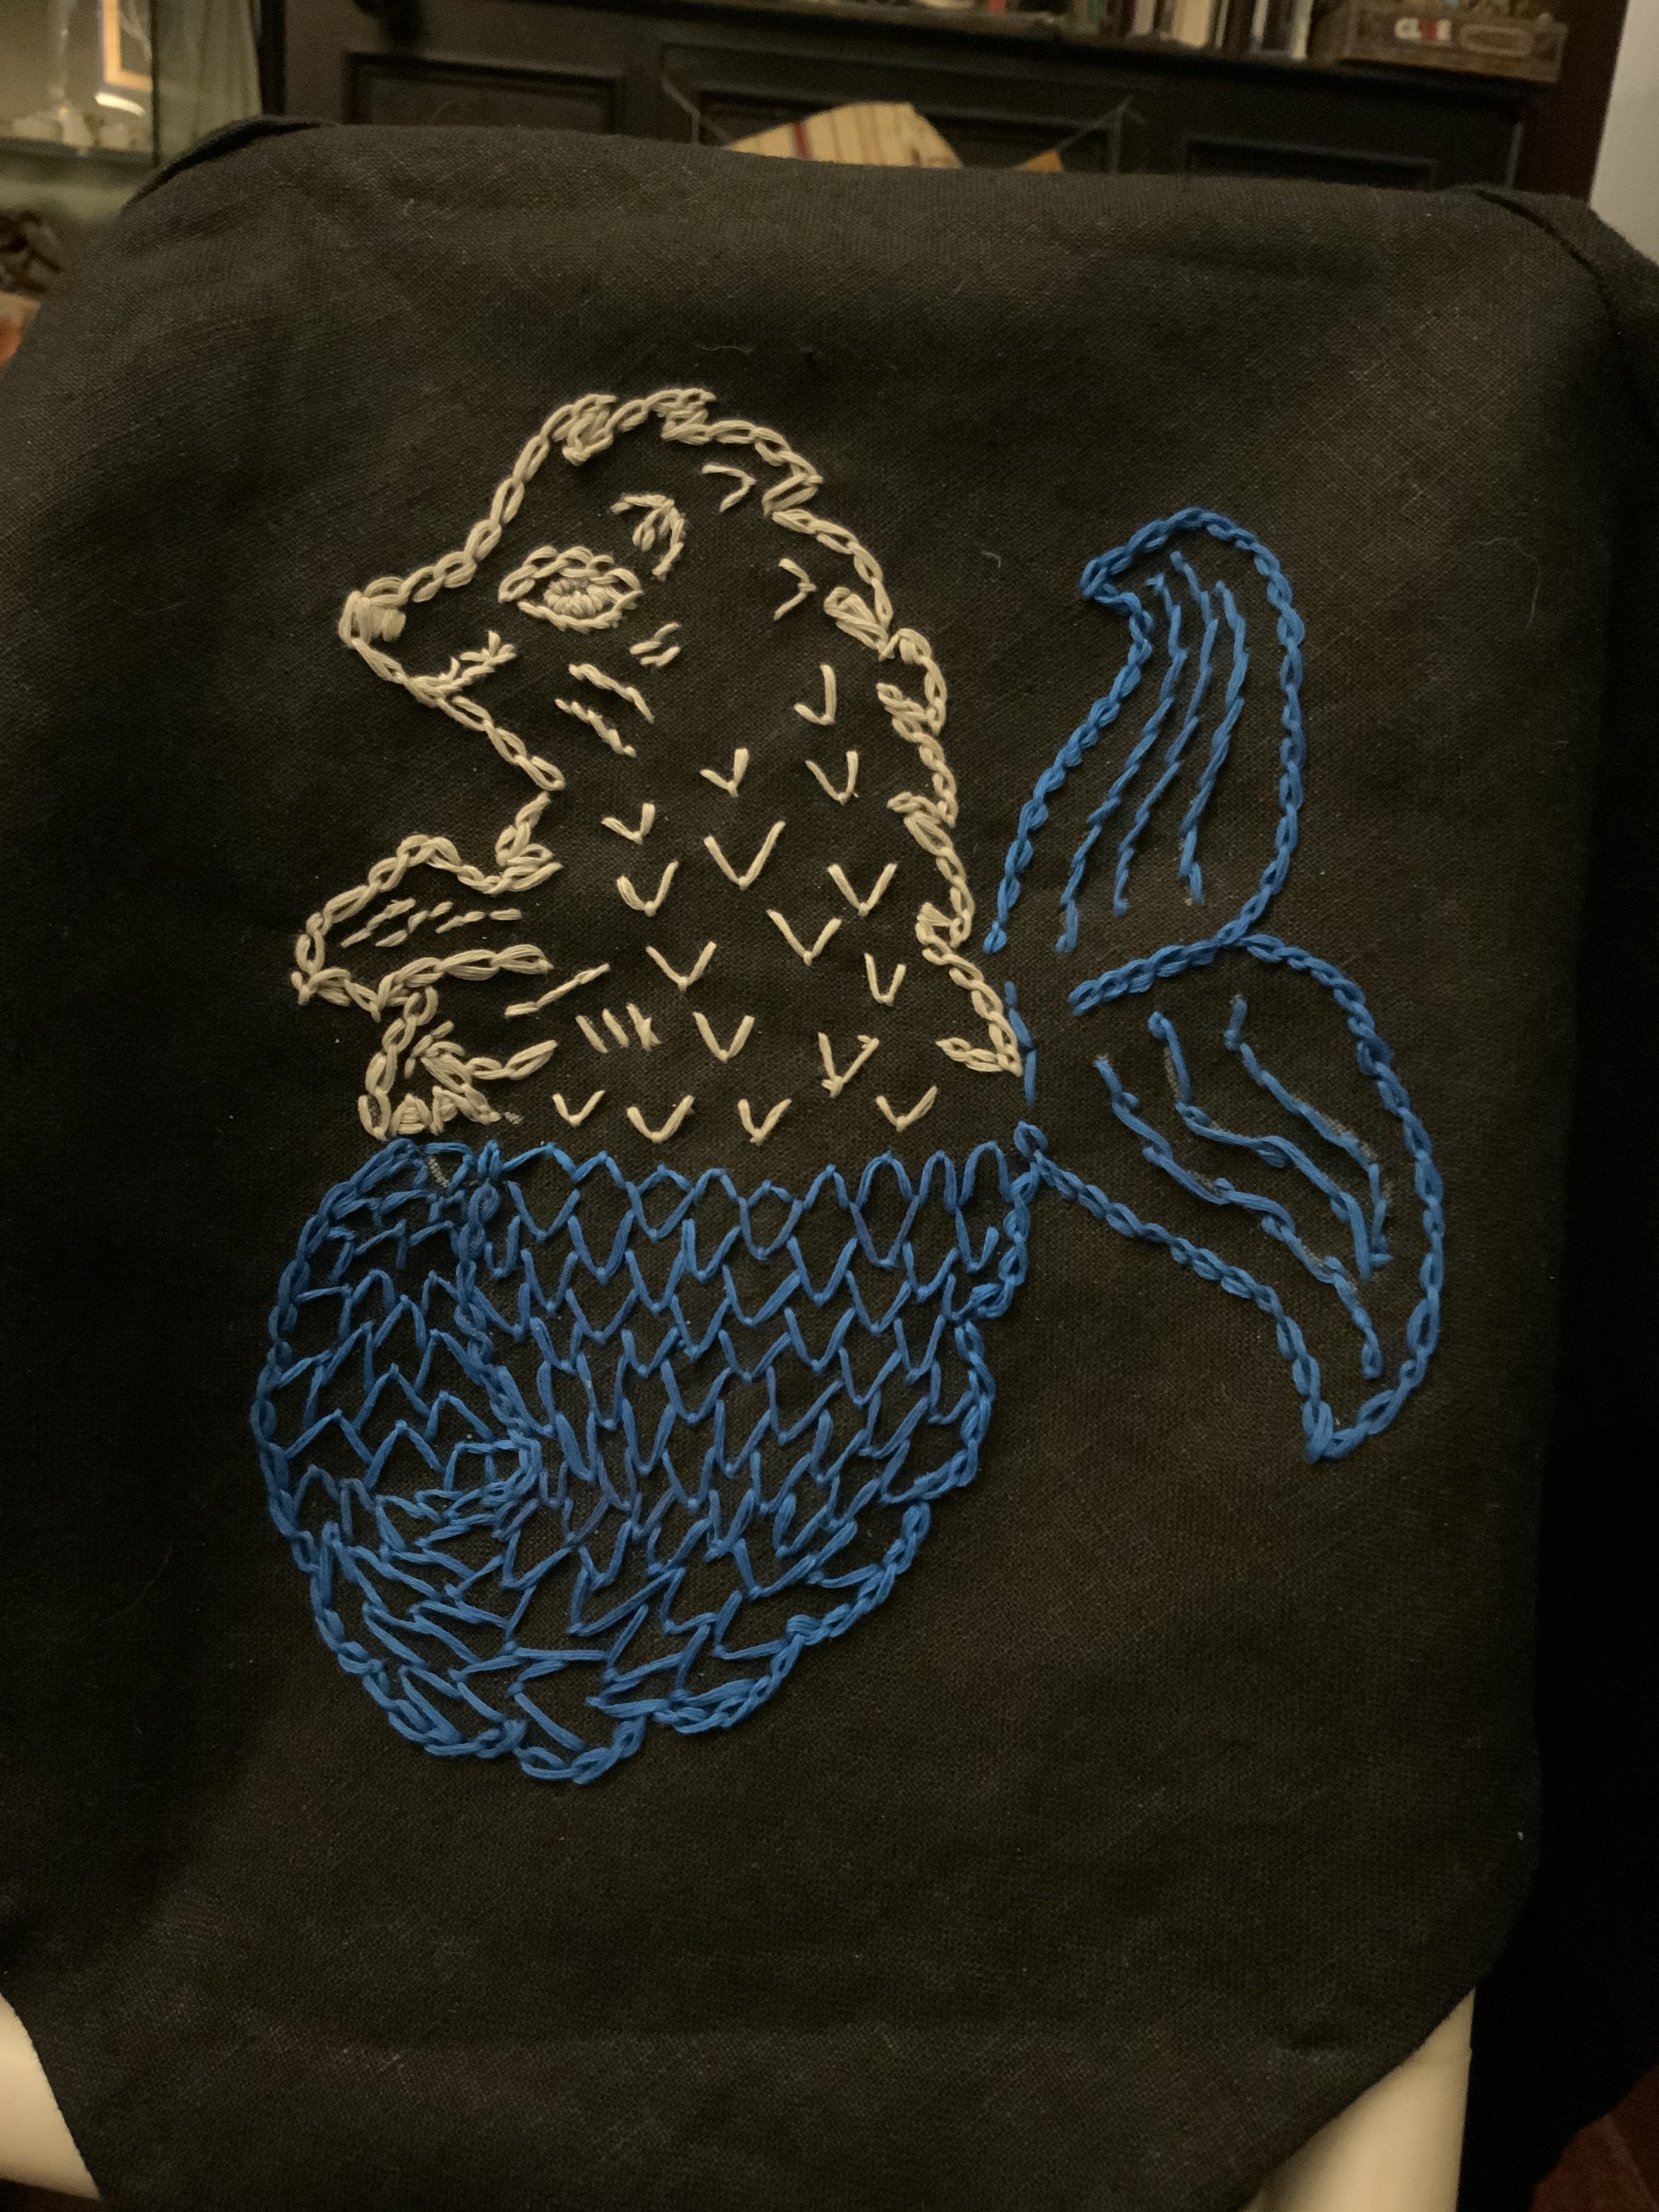
I was glad I waited to pick thread until the completed hood arrived. The background was darker than I anticipated, and my choices would have been too muted. I was surprised by how well this acid blue popped against the black. The winners of the thread comparisons were argent (for the top) DMC 3072 and azure (for the tail) DMC 995.
I tested the look of the thread by doing a few chain stitches in the area I would be working. 6-strands was the most attractive to my eye for a design at this scale. I pulled the strands apart & put them back together to de-tangle them, then waxed & ironed them. For the azure fish tail, I used 6 strands, starting with a knot. For the hedgehog head & torso, I doubled 3 strands, starting with a loop. This gave a smoother effect for the scales of the tail, and a spikier effect for the spines of the body.
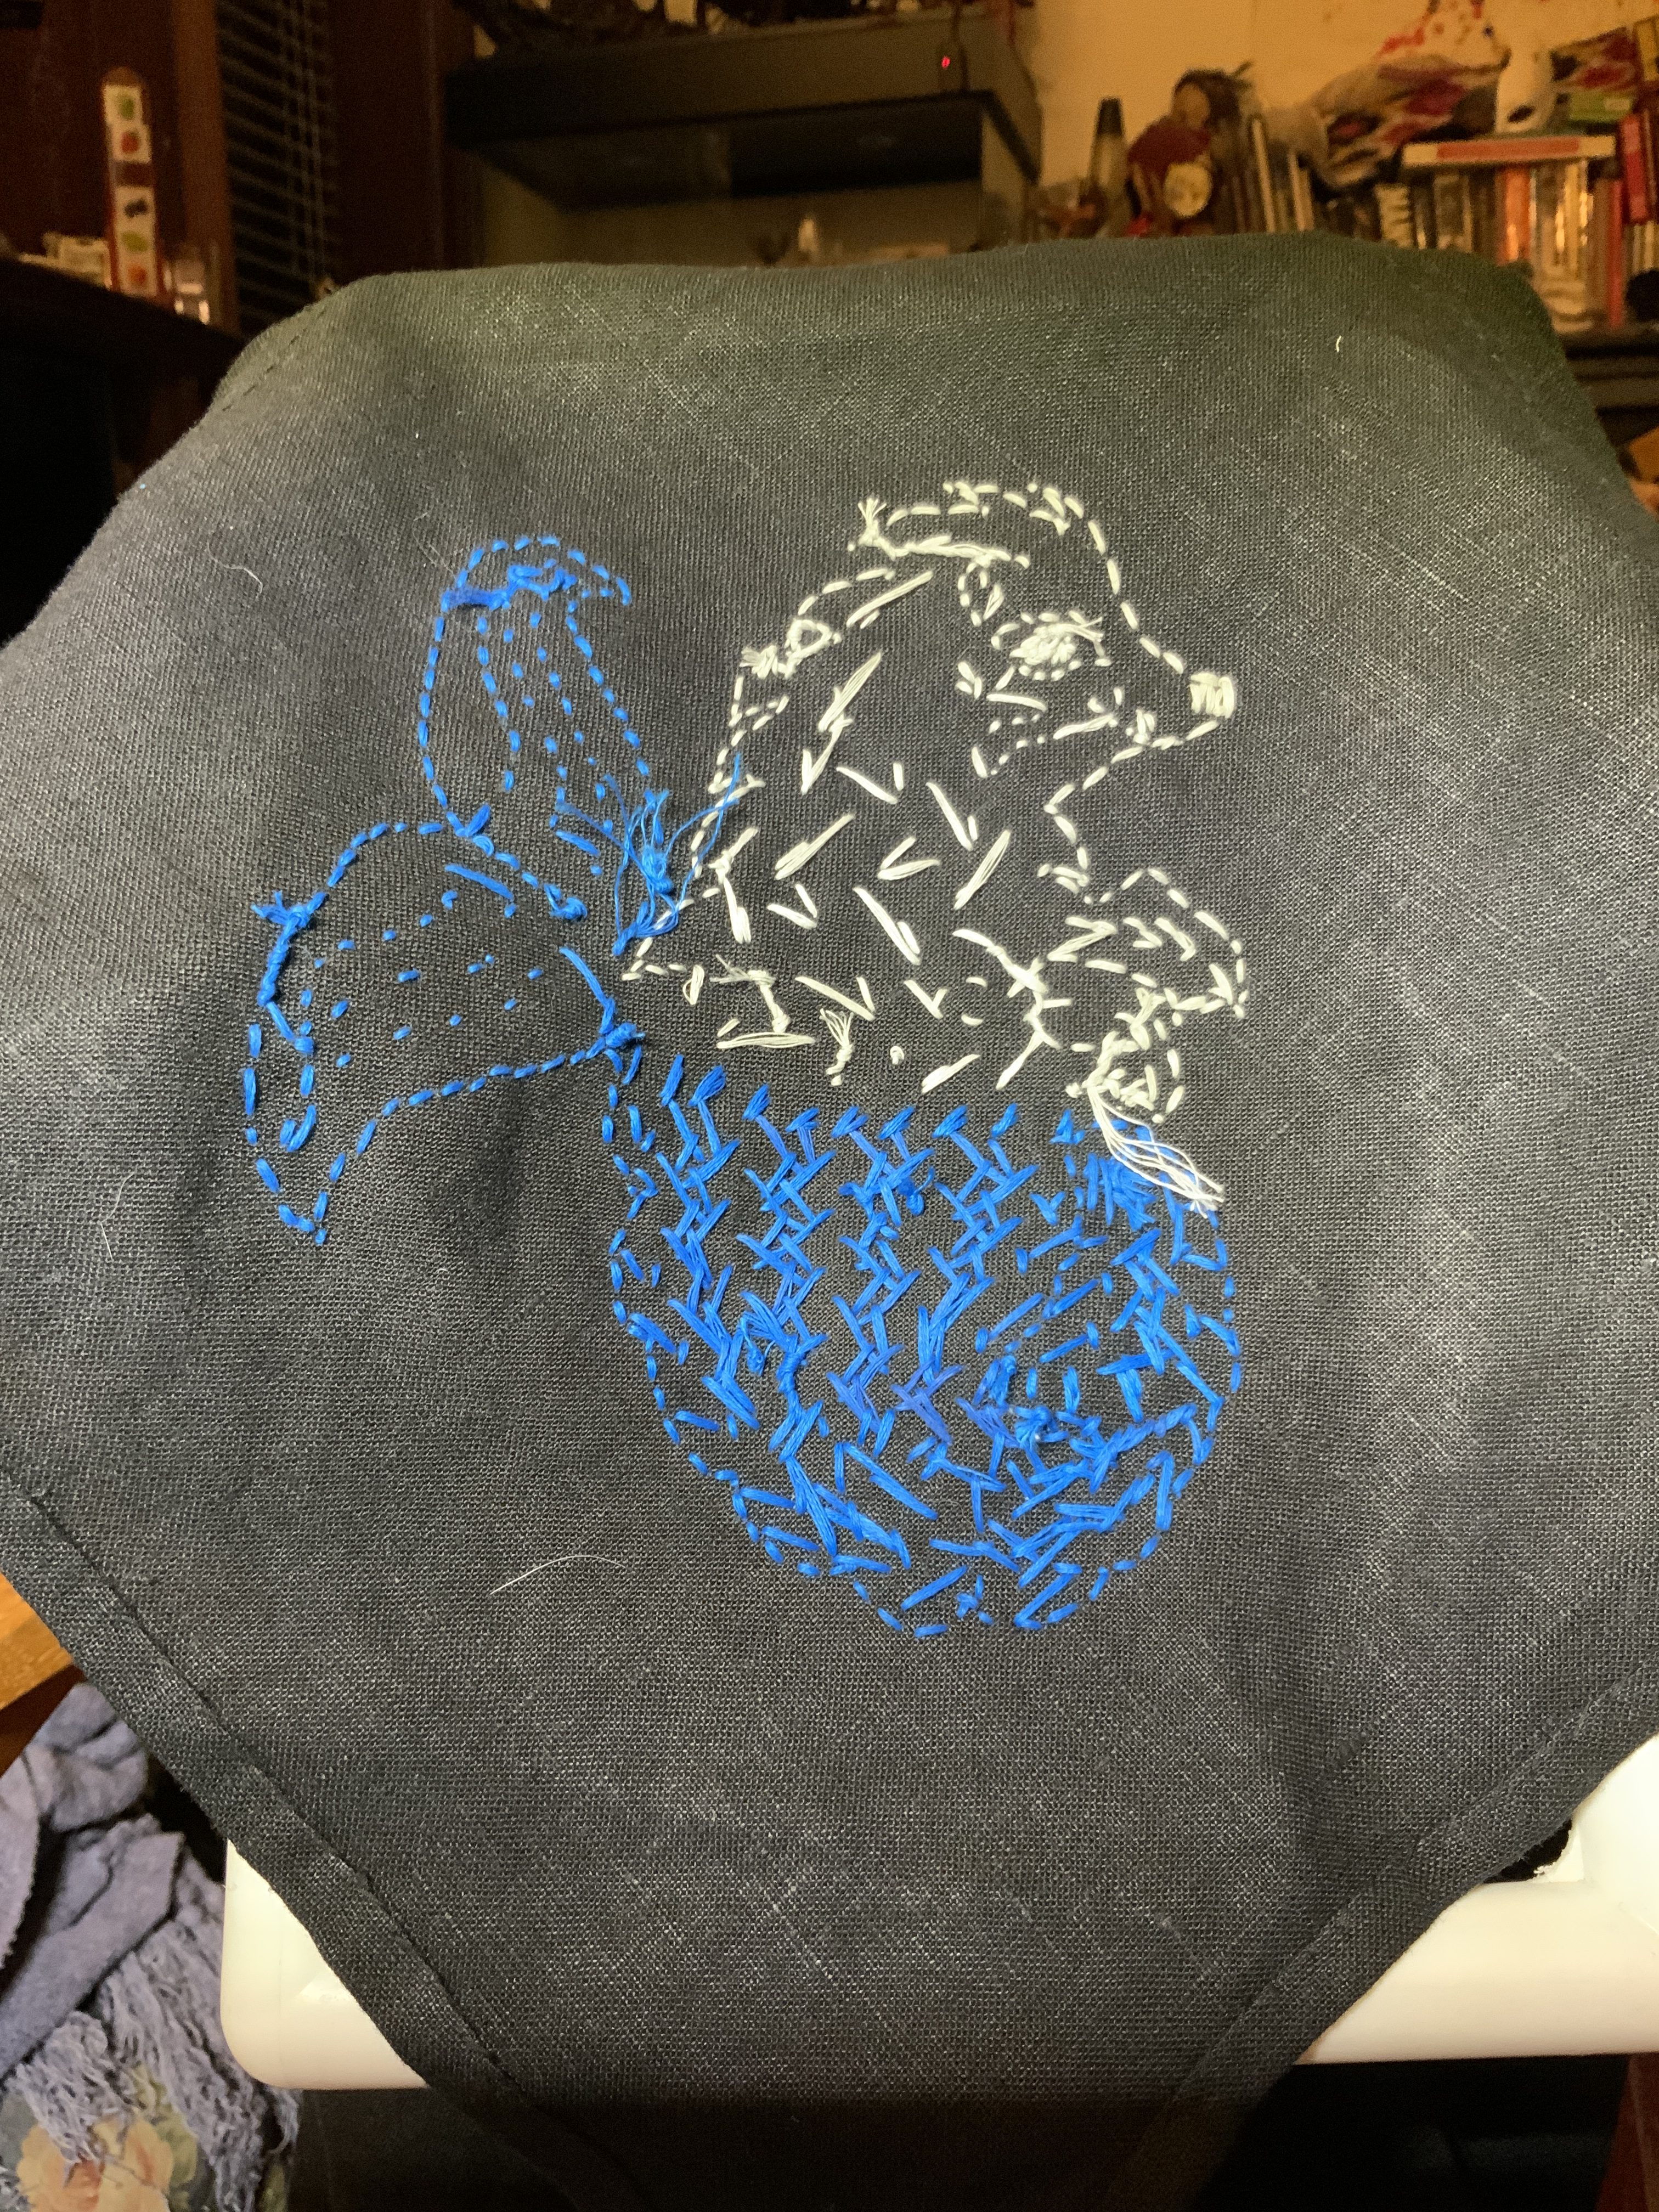
The black fabric was dark enough that I couldn’t use pencil (or a light box) to capture fine detail. I tested a chalk-based, water-soluble white marker by drawing a line in a discreet corner of the inside of the hood. I left the mark in place for 24 hours, then rubbed it out with a damp cloth. After the material dried, there was a faint trace of white left behind. I was sure it would come out with more wetting, but resolved to use the marker sparingly, just in case.
The order is relatively new and still undergoing armorial approval. The device has changed from its original submission, and there is more than one version of the artwork for both old and new blazons. The field was clear for me to add my own artistic vision.
I asked the Elmet Herald, Mathghamhain Ua Ruadháin, to find examples of sea urchins in existing artwork. He located these two examples from the SCA armorial:
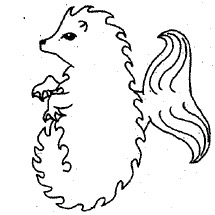
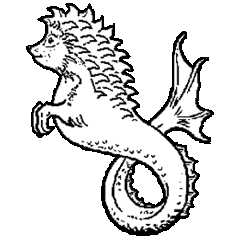
I mashed them together using the outline of the first, and the feature details of the second:
.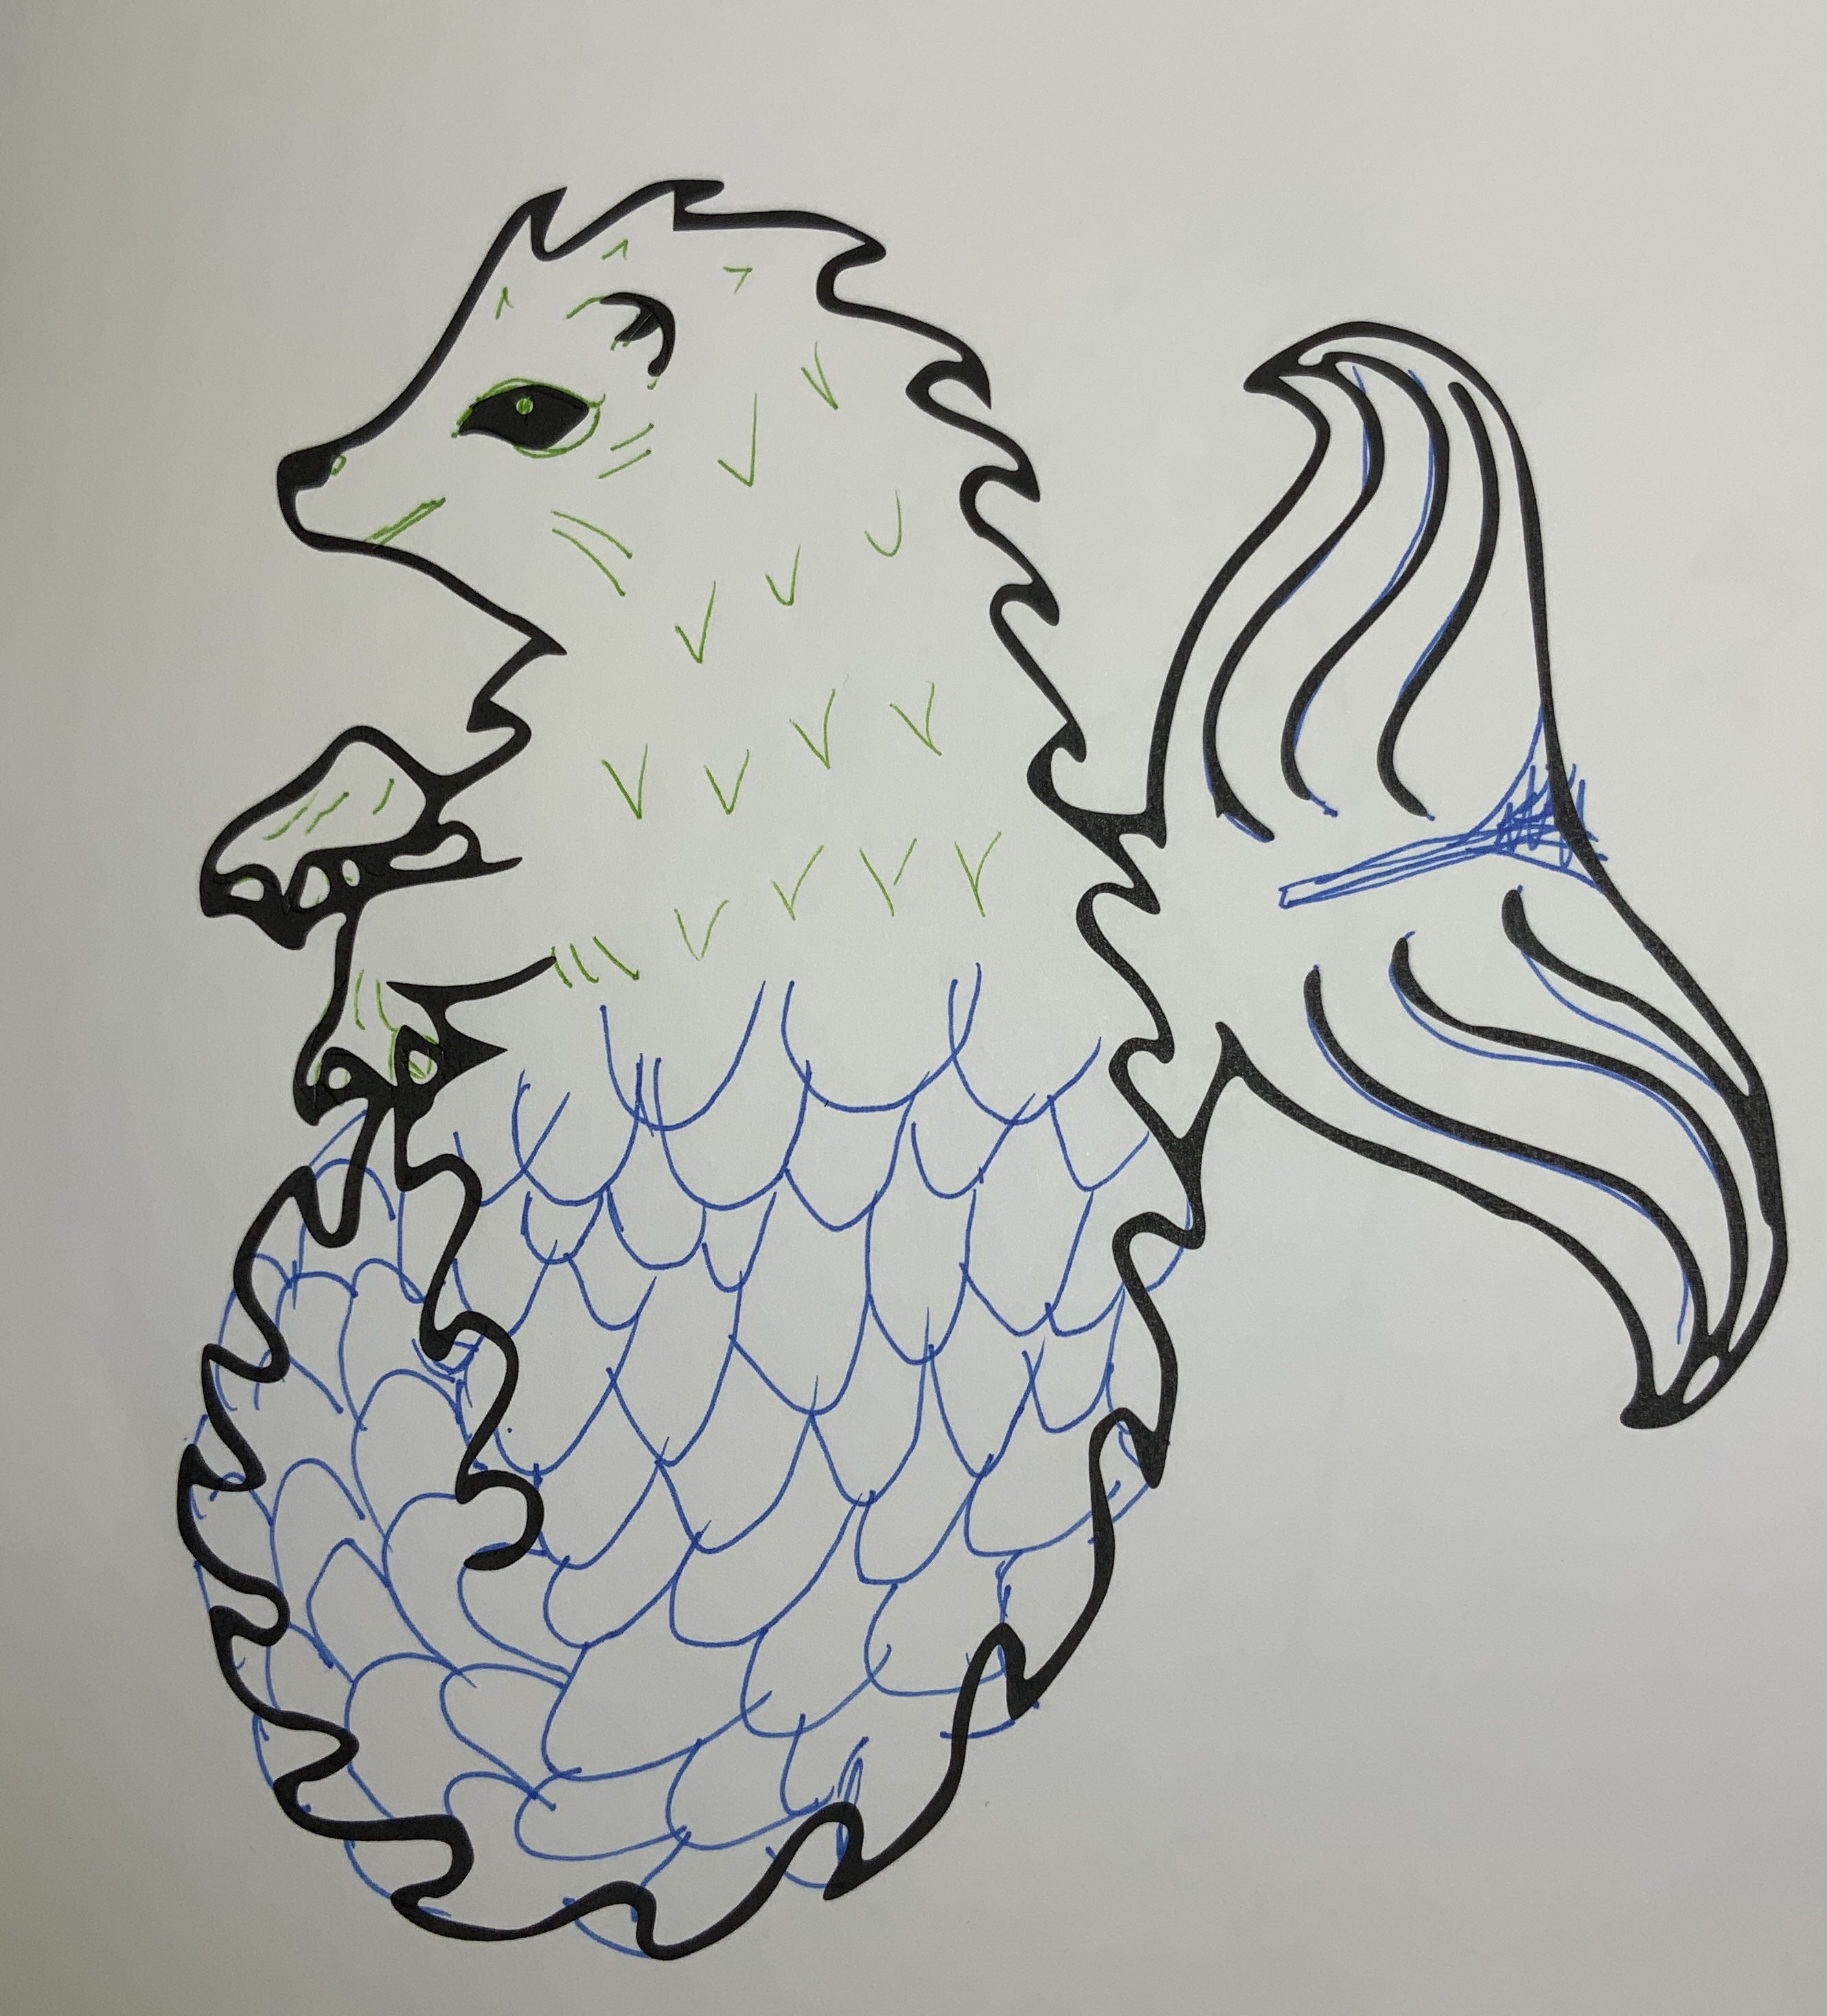
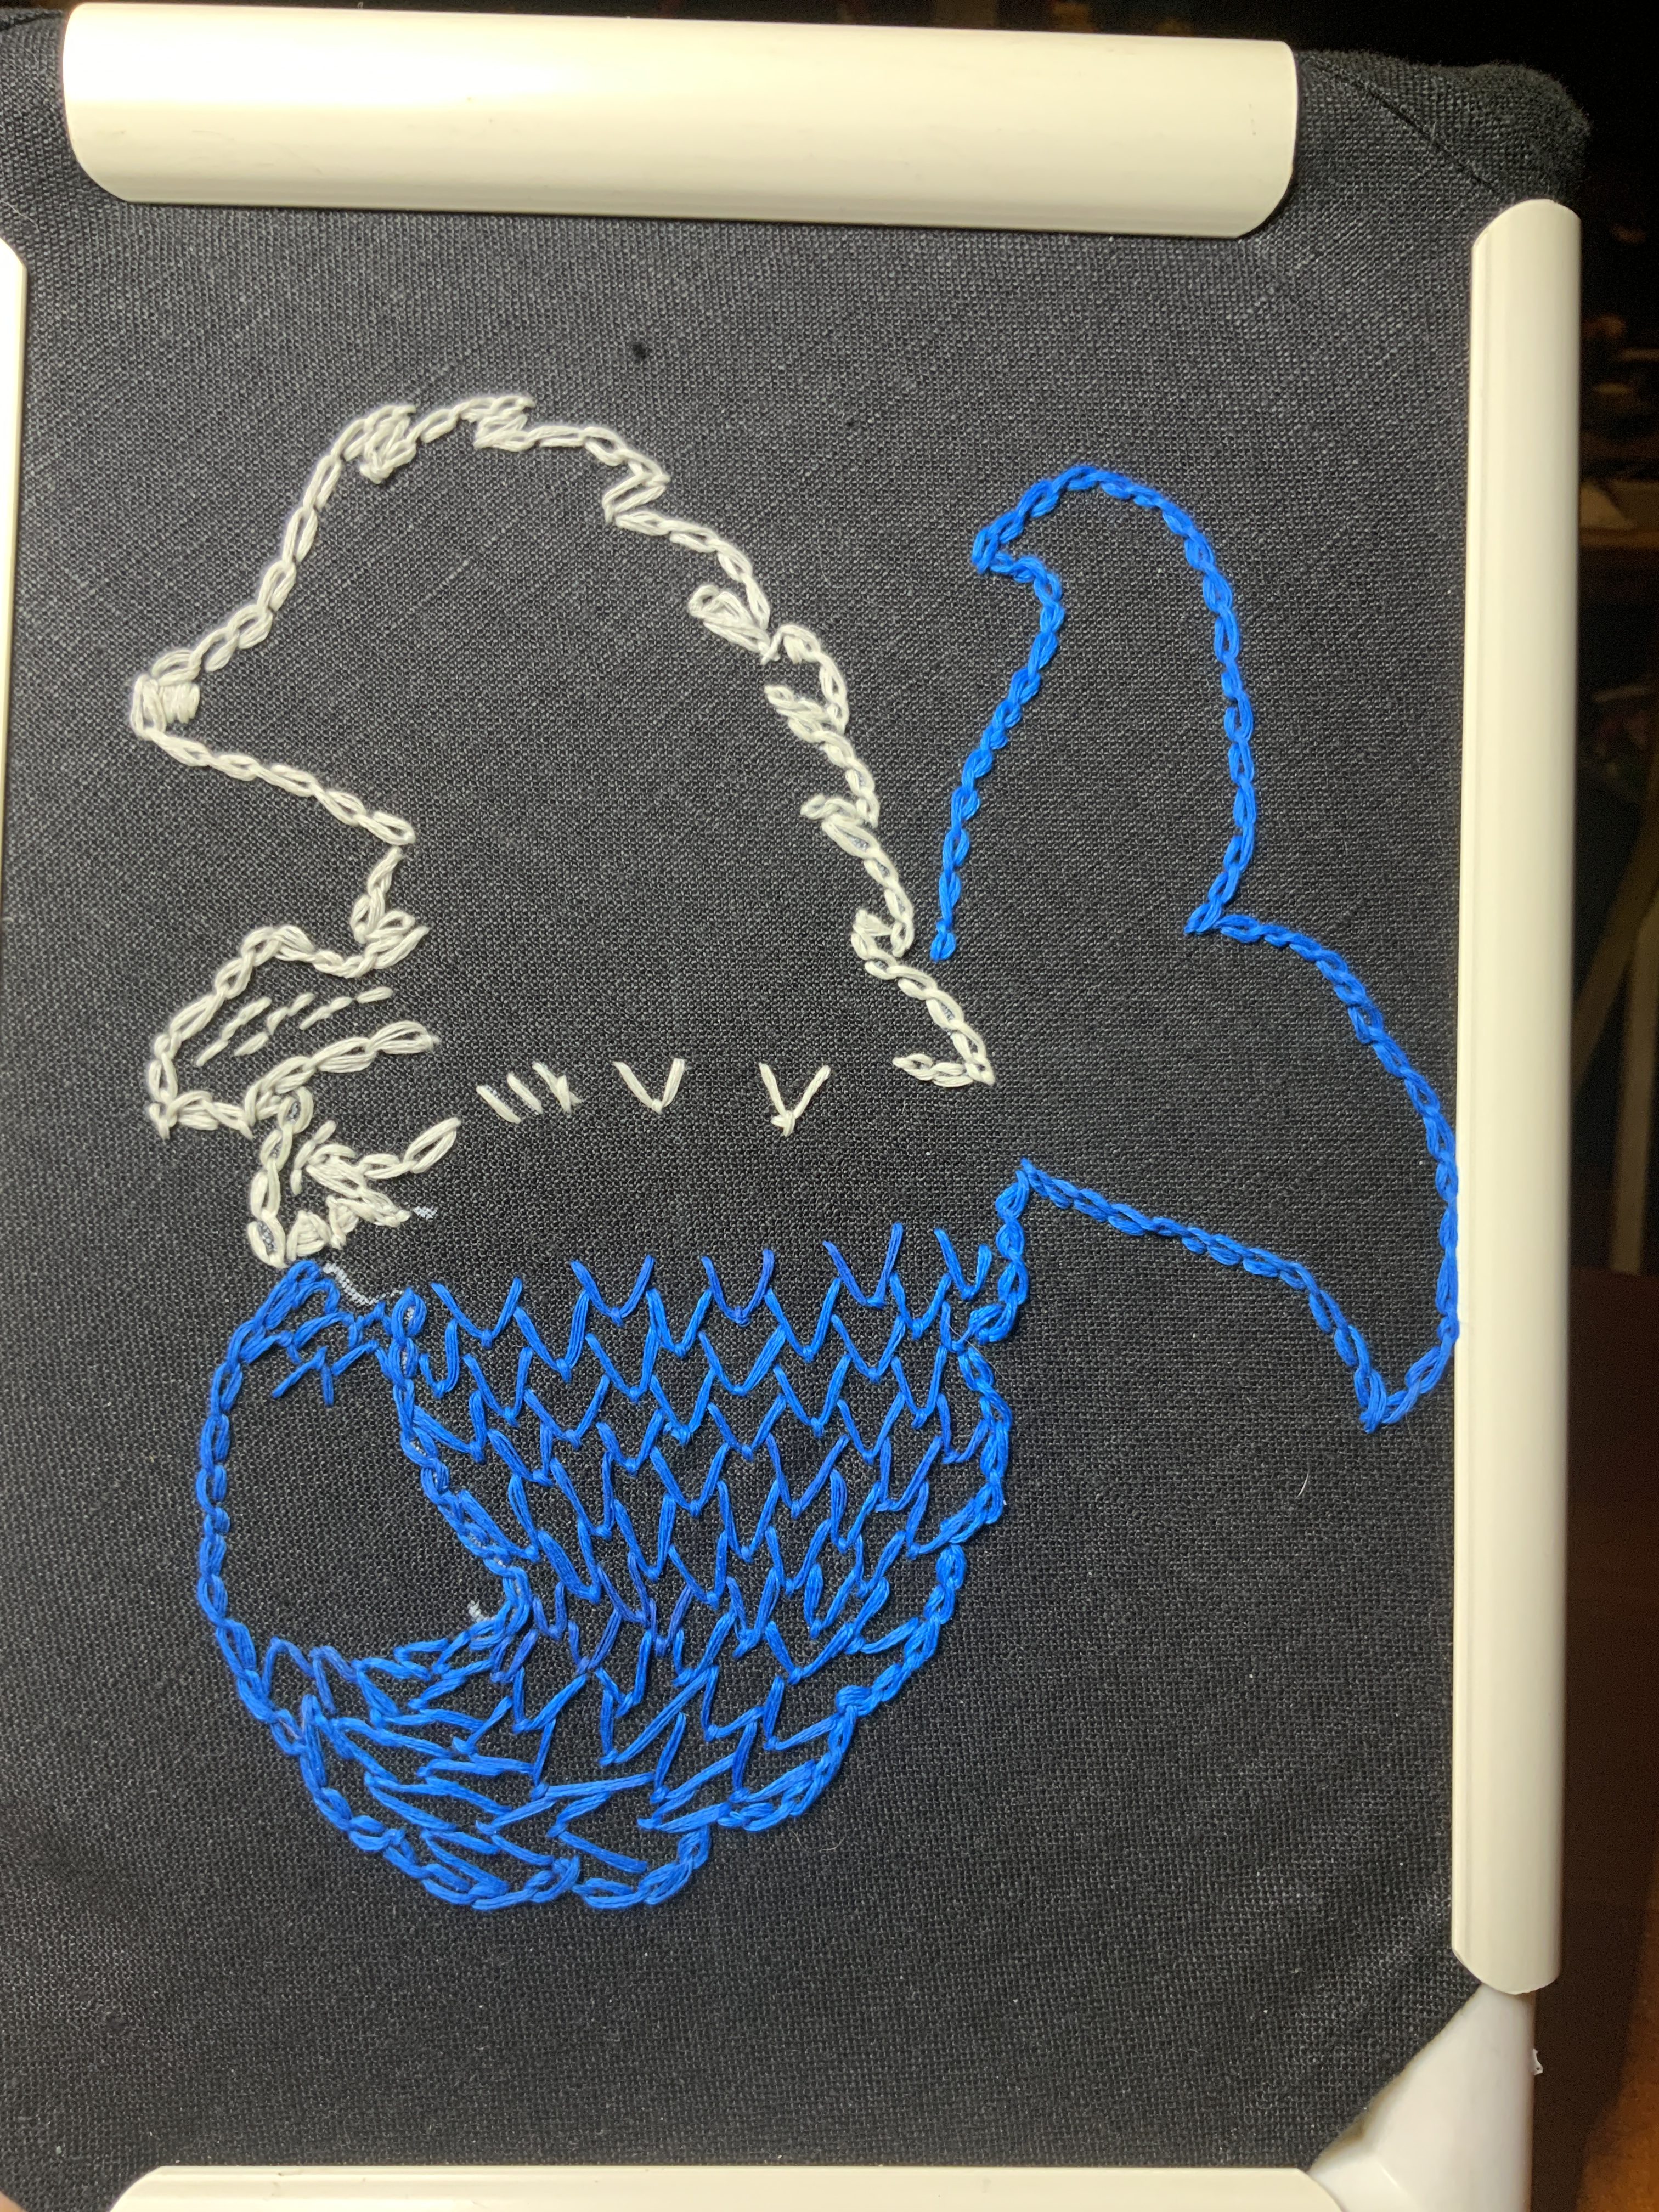
Prior instances of the regalia hood for this order have placed the embroidery on the front gore, which is an excellent display location. I measured the reasonable display area of the front gore on chthis hood as ~5”x7”. I printed the sea urchin at a height of 7”, drew on the display details, cut out the artwork and basted it directly onto the front gore. I then began stitching around the edge.

I chain stitched the outline, beginning with the fluke and working my way around the butt, then switching to the back, head, and arms. After I had stitched around the fluke, I cut it off the paper to give me access to the outline of the back for the argent top hedgehog section. Likewise for the arms, I cut along the underside and lifted them out of the way to draw on the correct curve.

With the outline complete, I began adding detail, some freehand and some with chalk markings. To reduce smearing and minimize the time marker was left sitting on the fabric, I started with the body fill treatments for the scales and fur. For the scales, I used fly stitch, worked in horizontal rows from the waist down, using 6 strands of embroidery floss all in the same grain with a knot to start (just like with the chain stitch outline).

The fluke outline is worked in chain stitch. Its interior details are worked in stem, chain, and double running
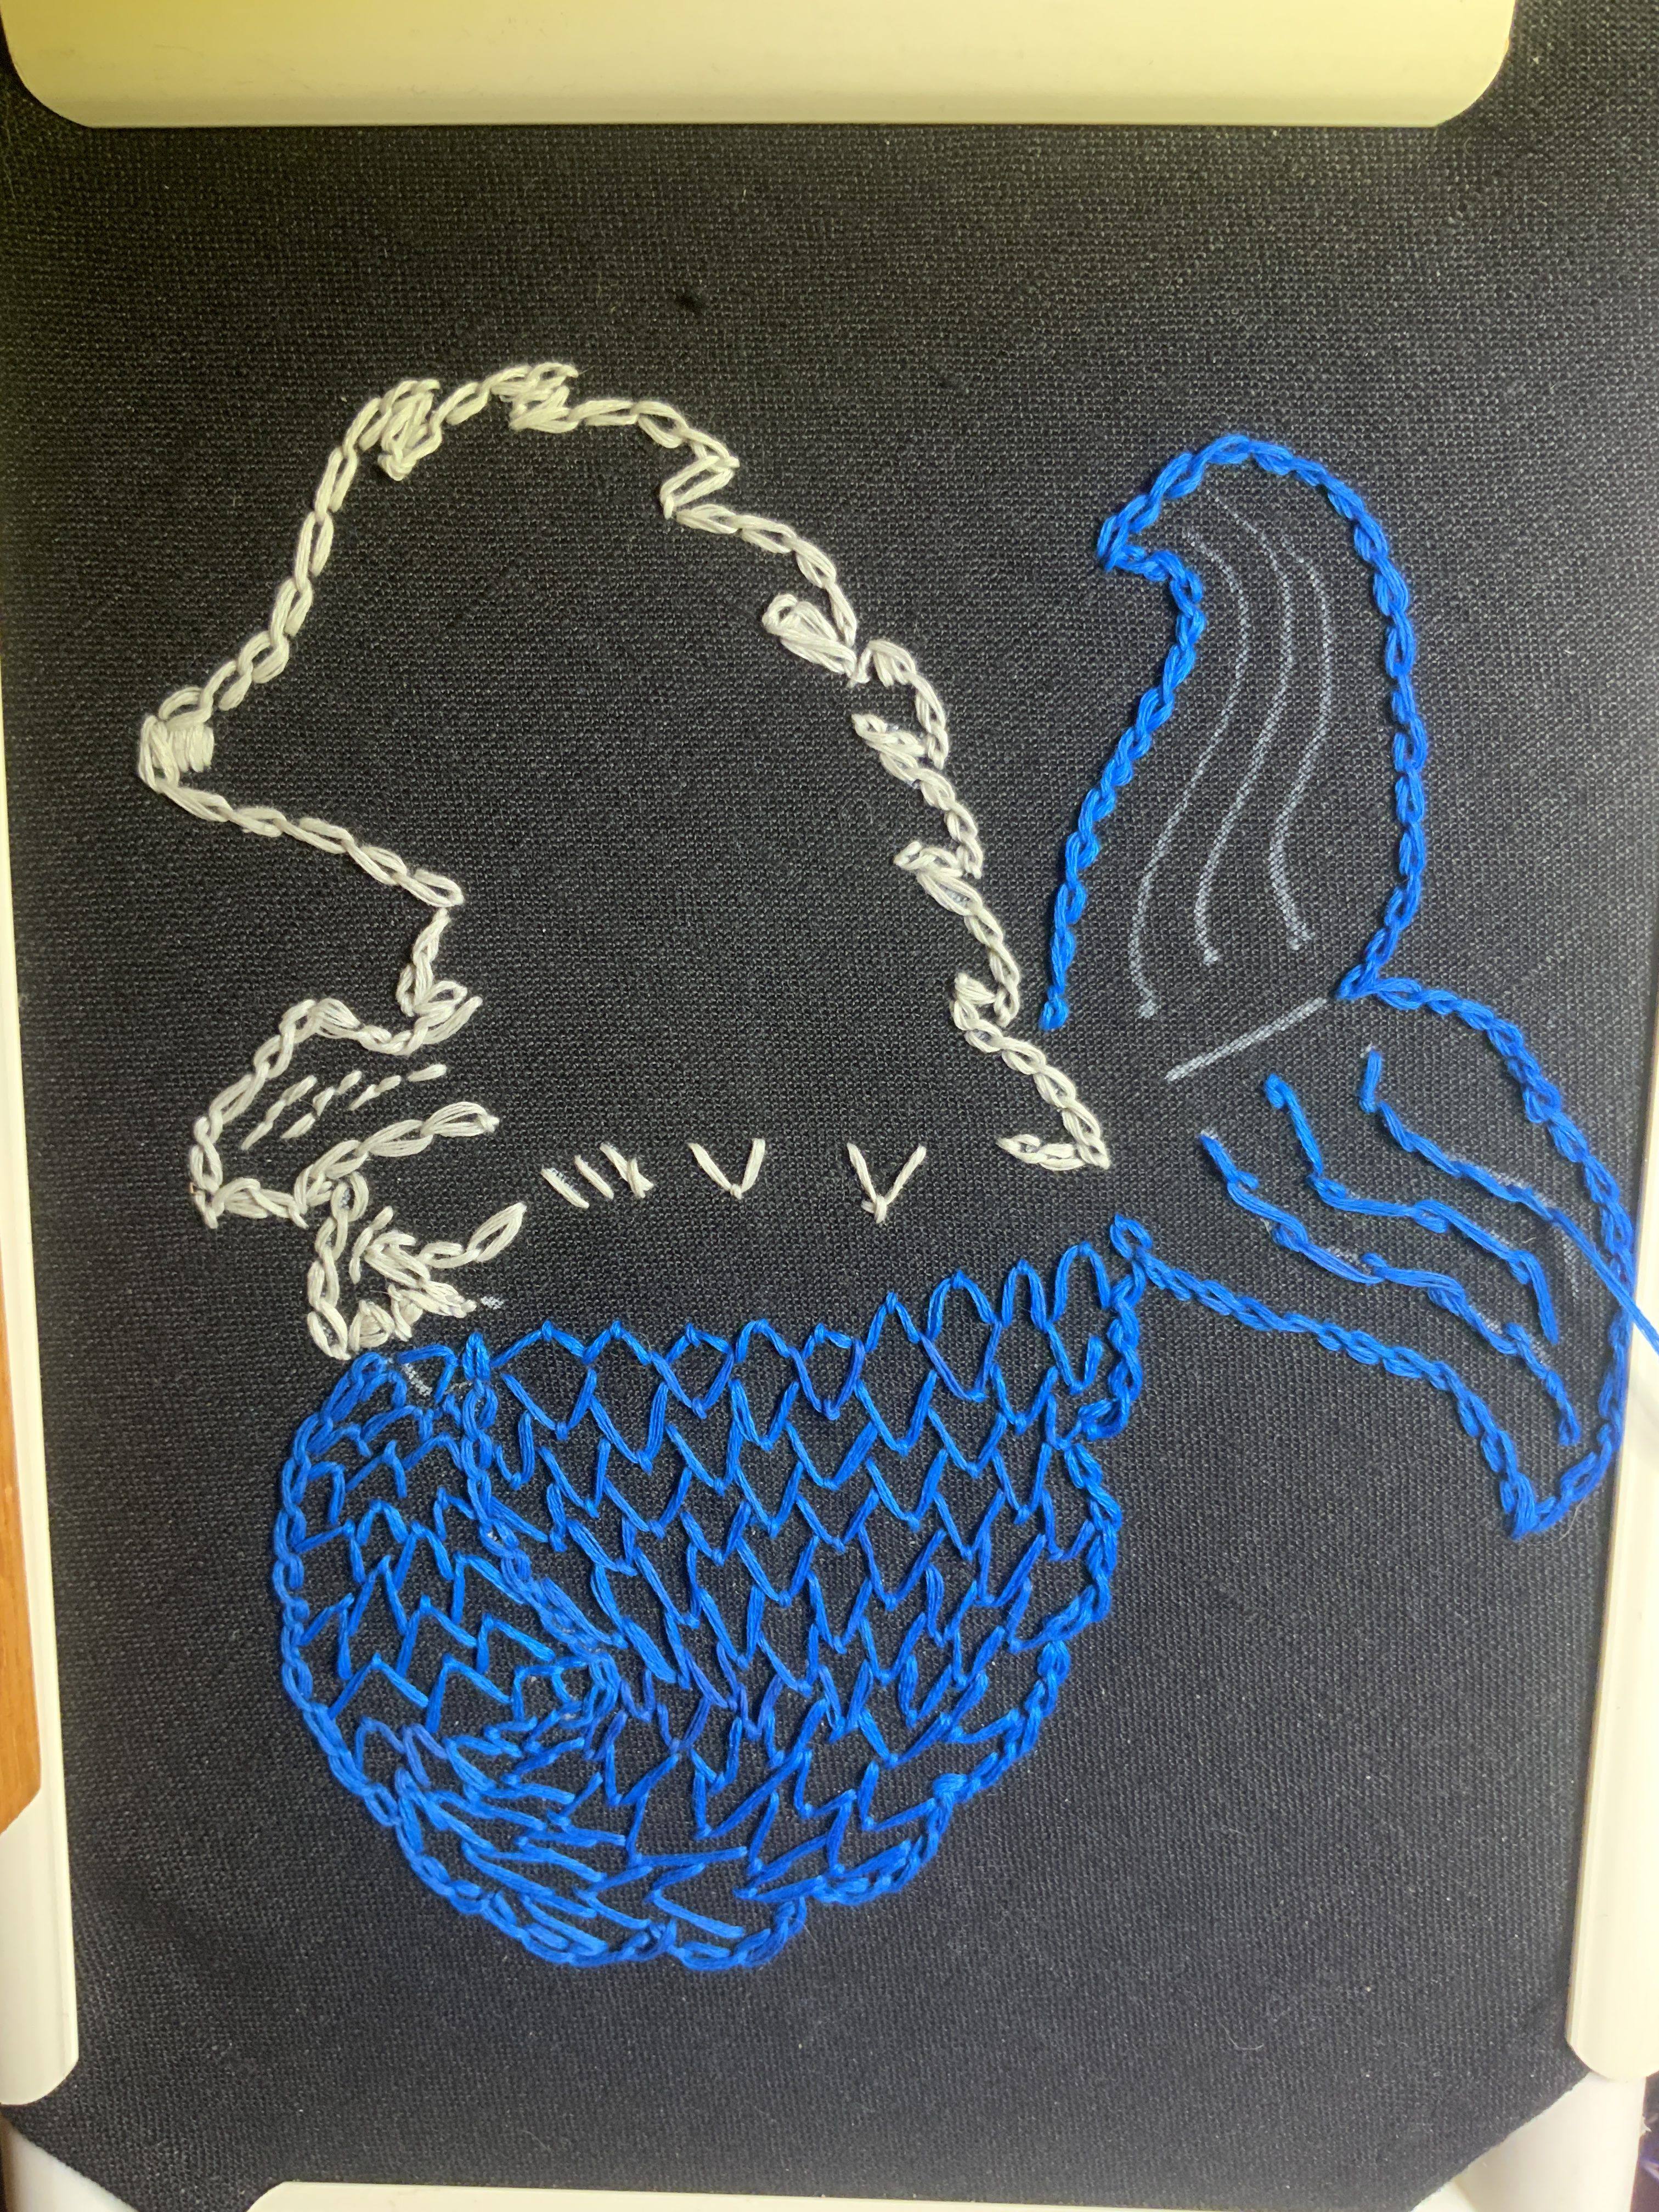
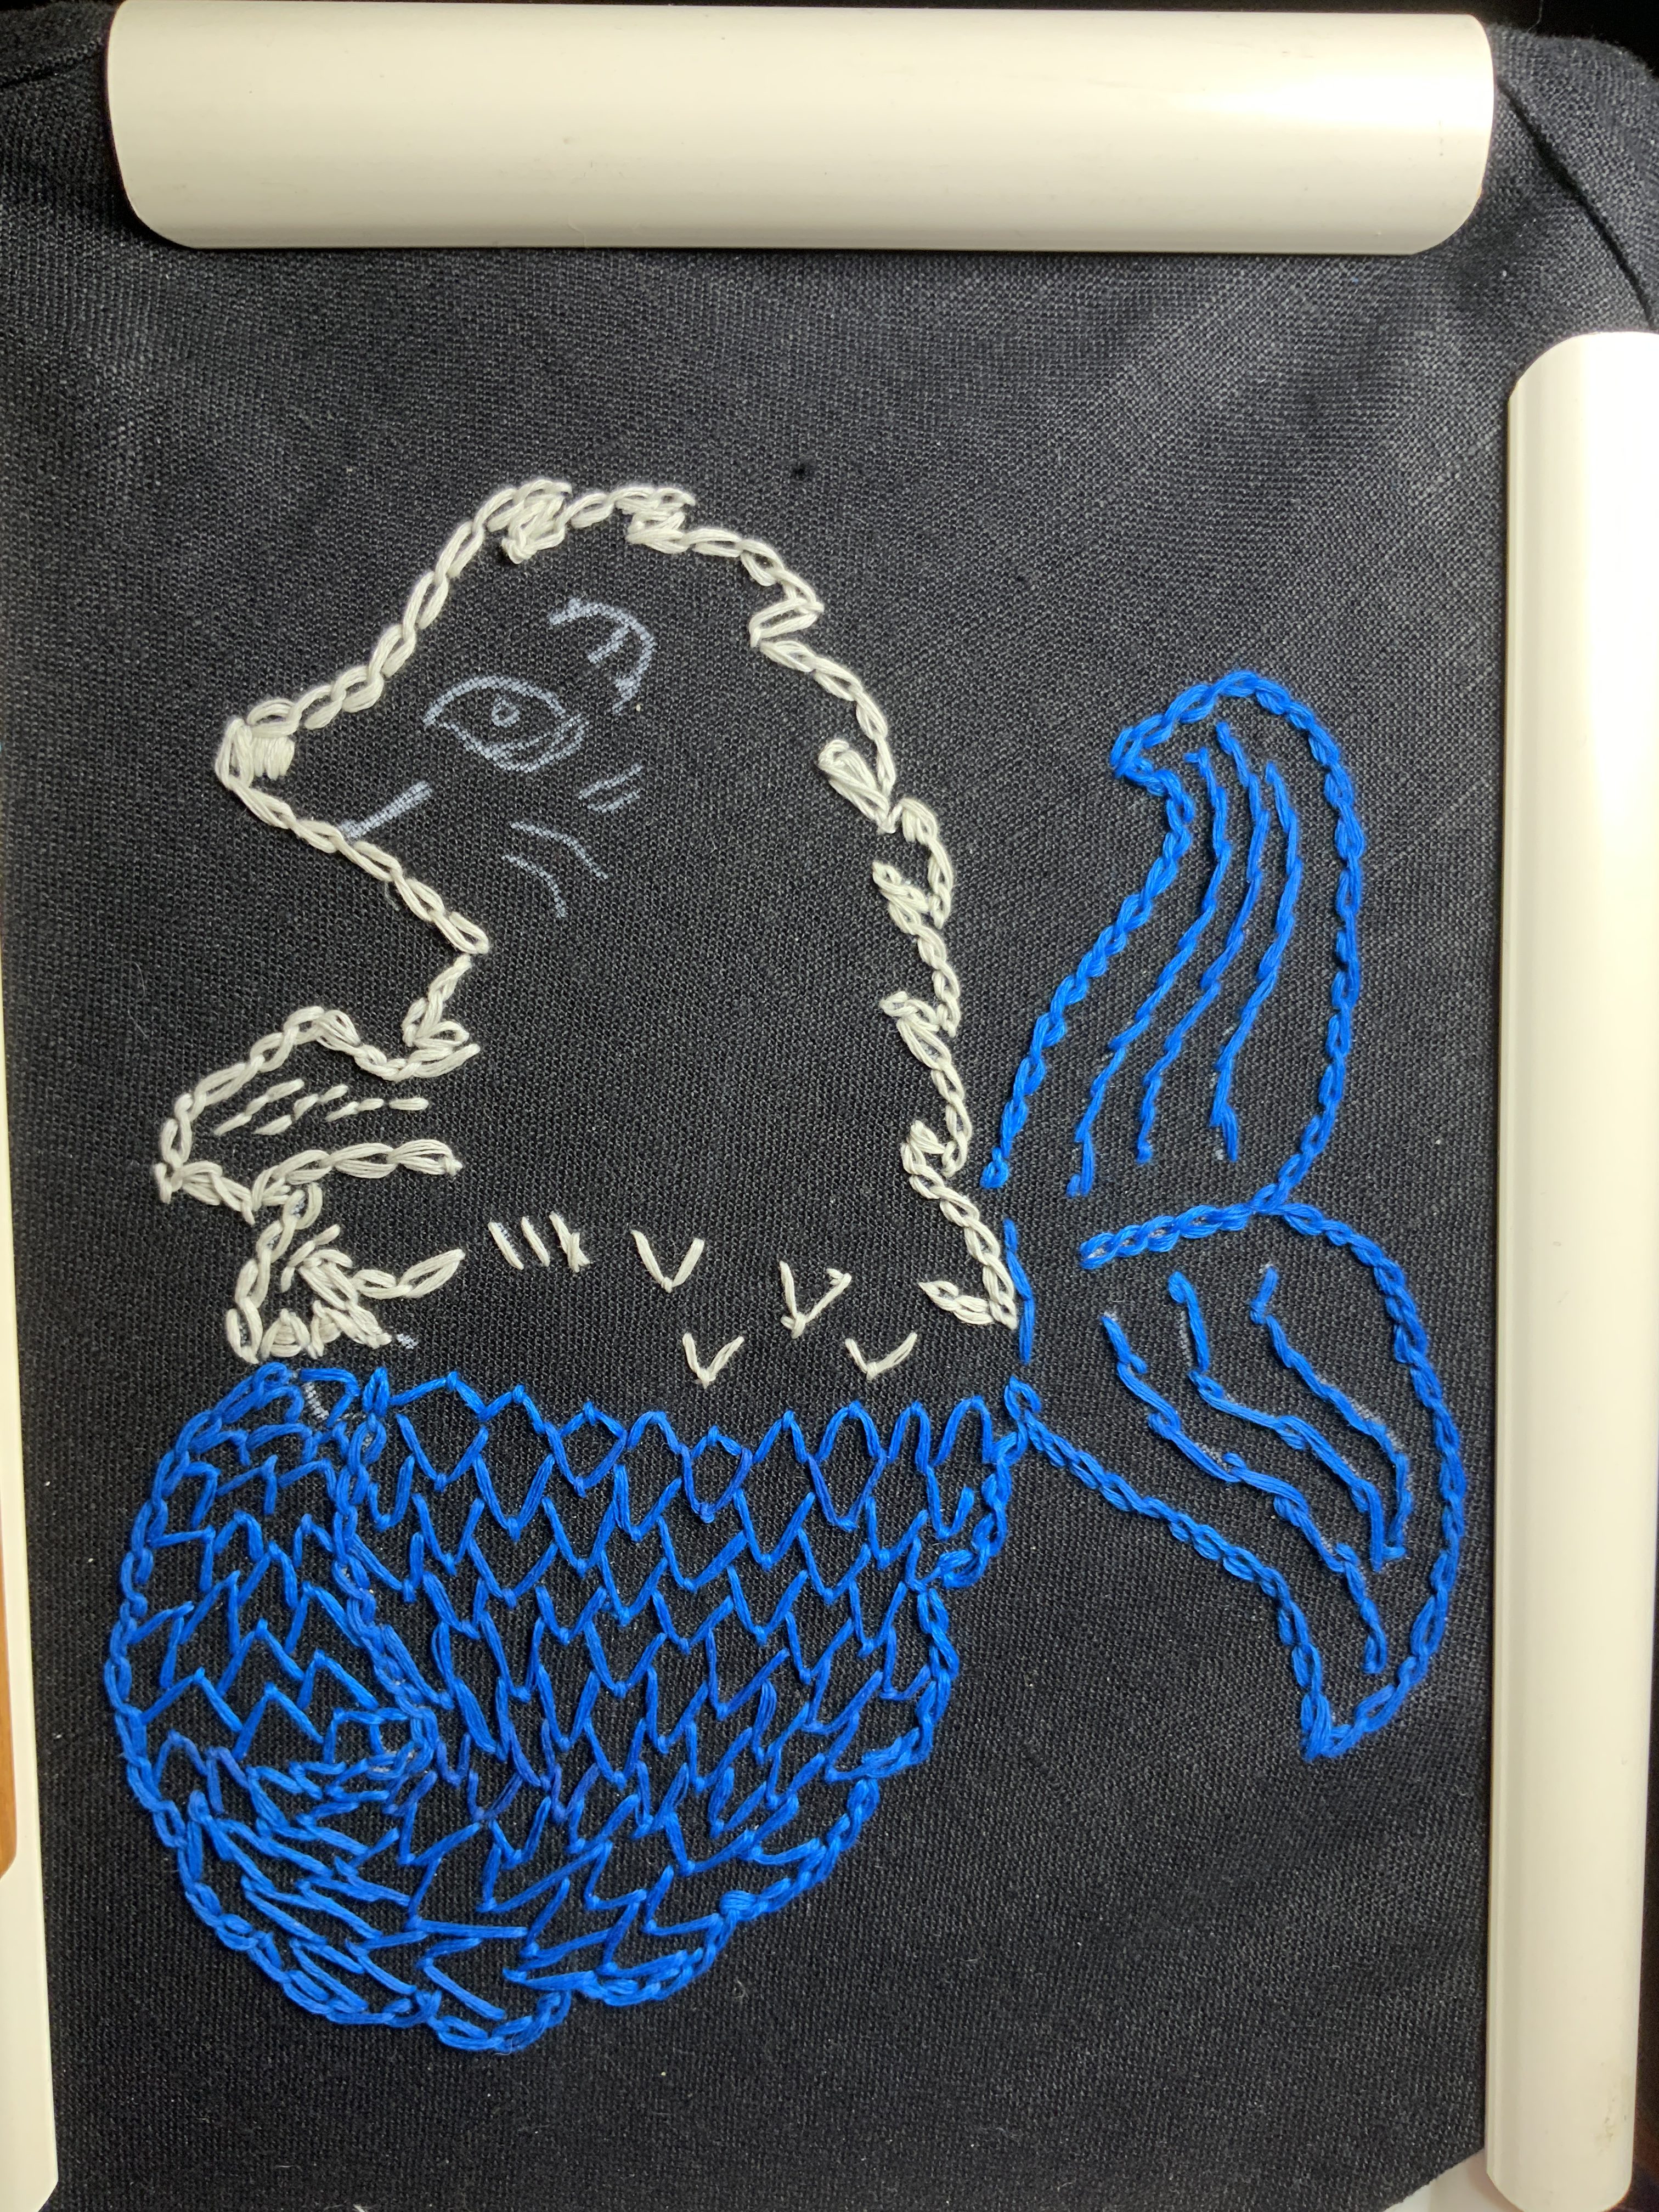
For the body fur, I used detached fly stitch, worked from the waist up, using 3 strands doubled (for a total of 6 strands) for cross-grained threads (half facing one direction and half the other) to mimic the spikiness of spines and for the ease of a loop start to avoid the need for a knot in this much emptier area.
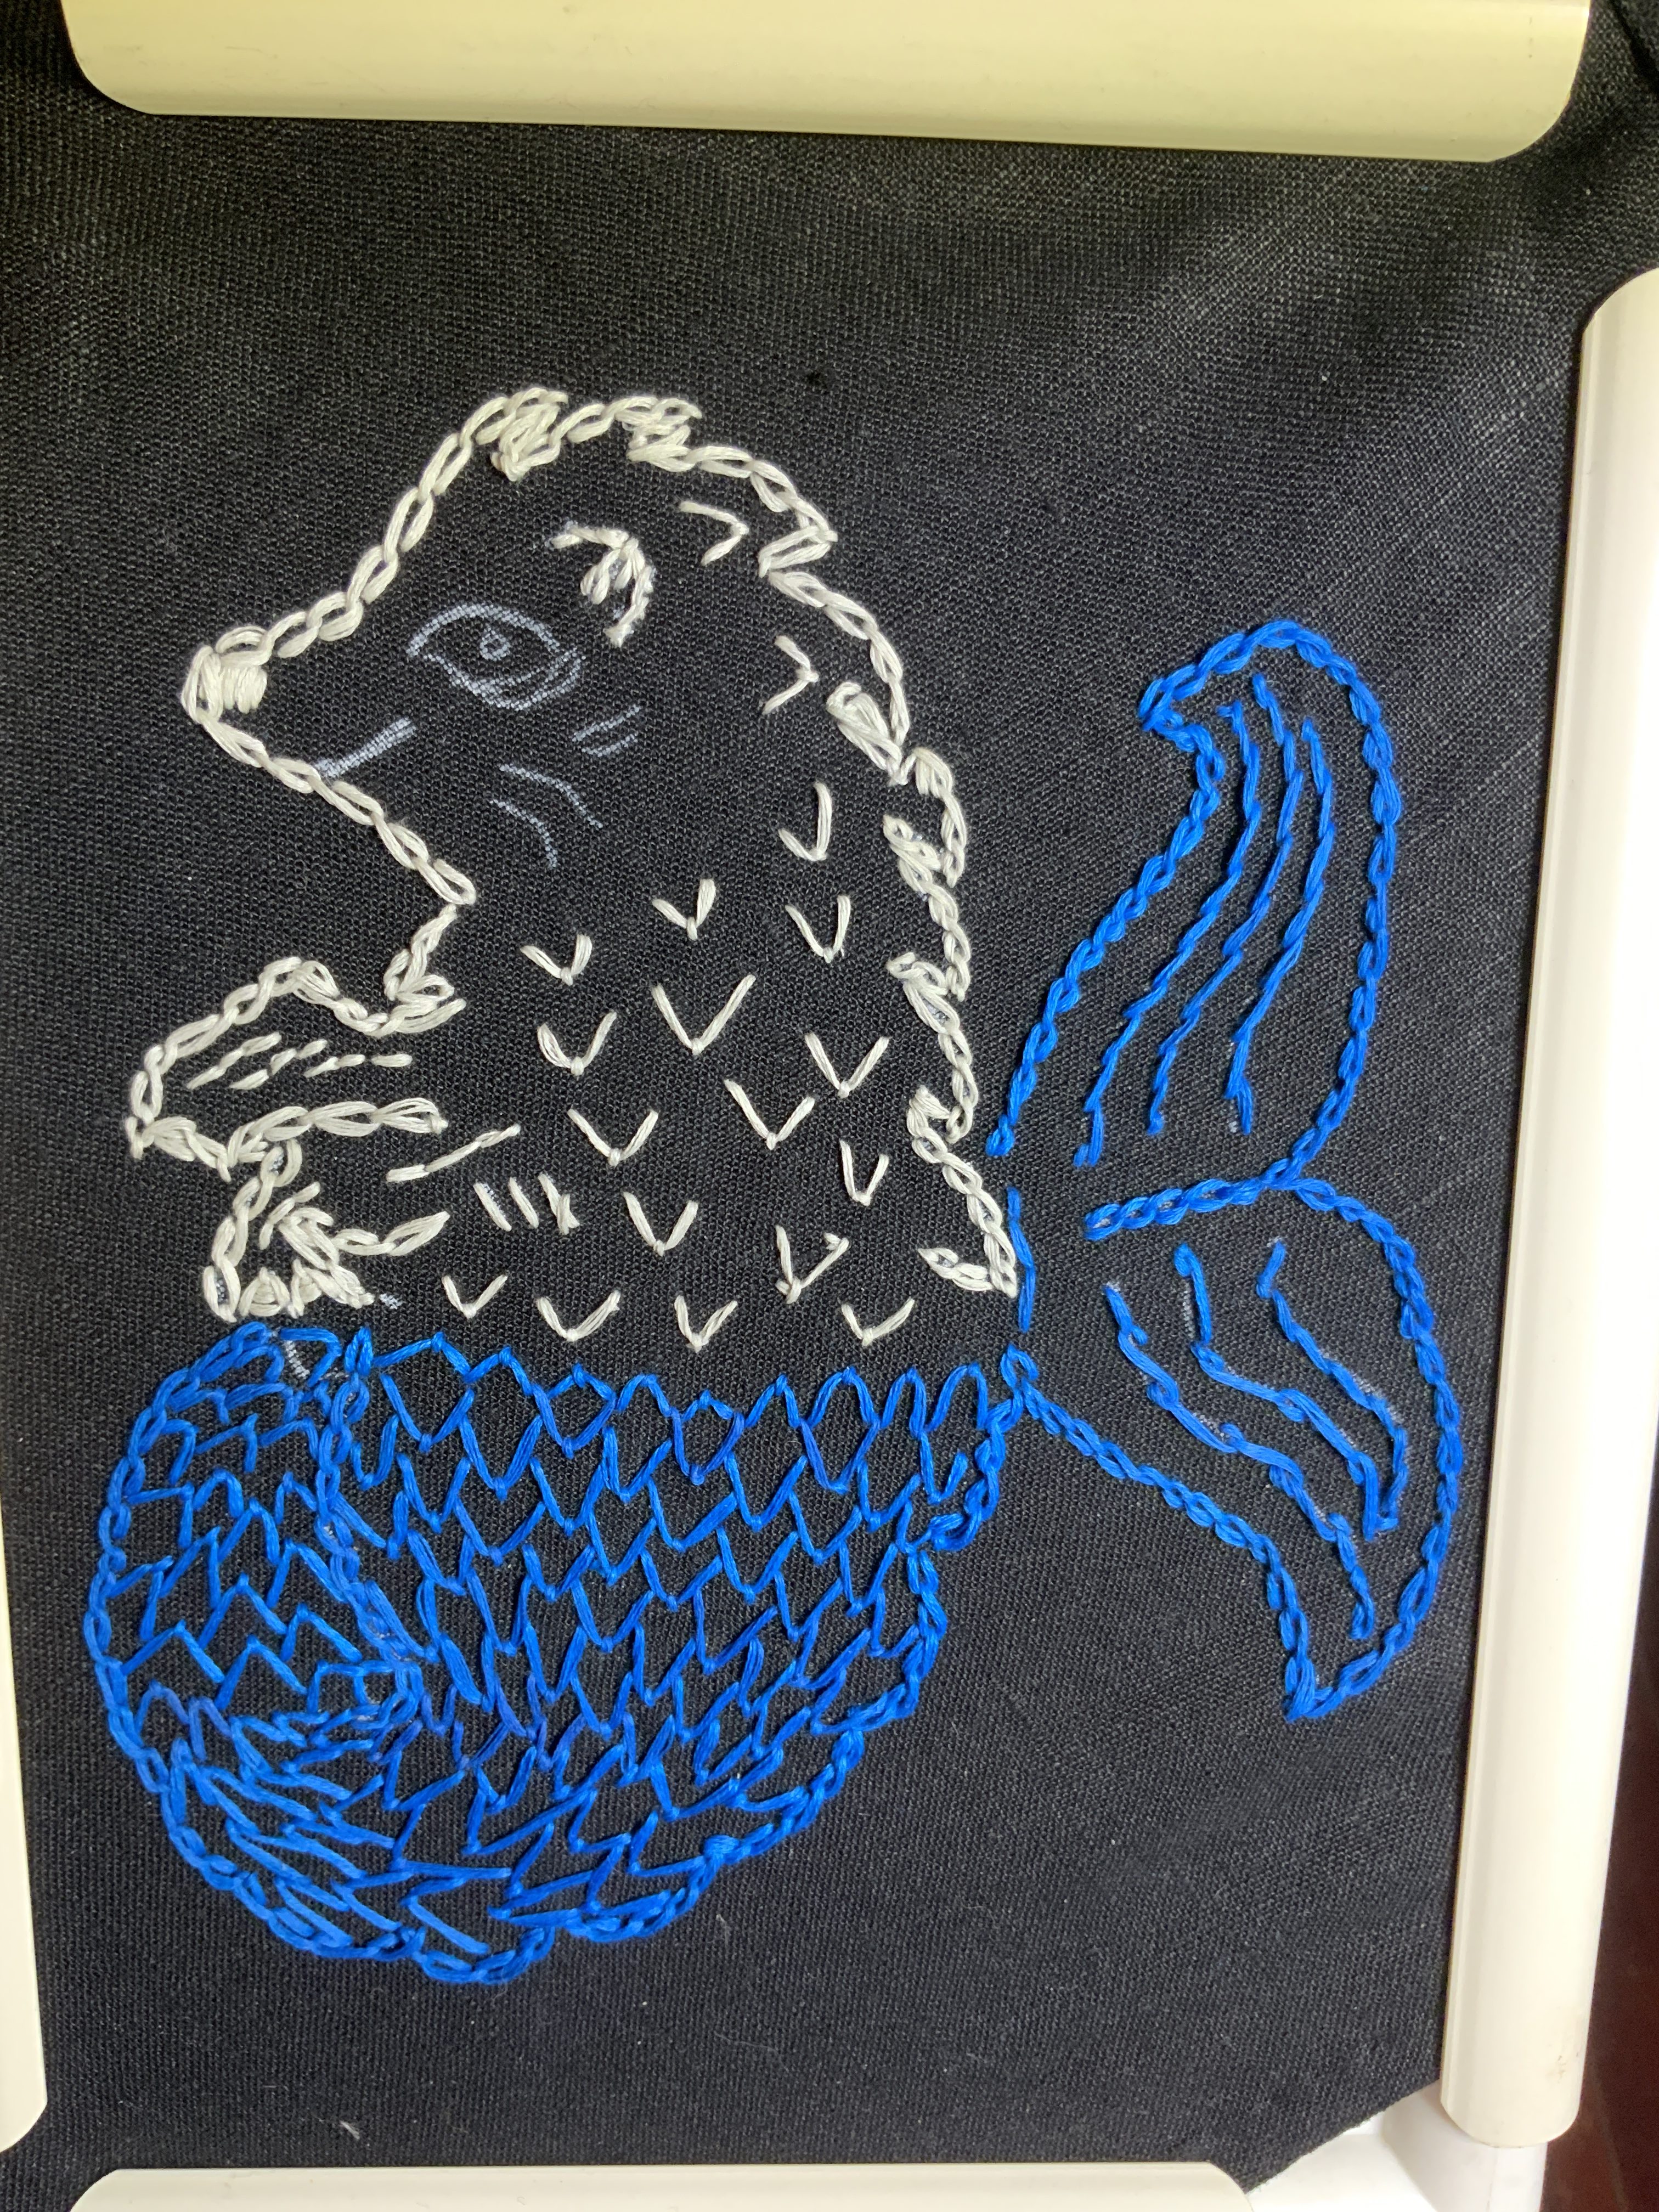
For the nose, I used satin stitch, for the eye, chain, satin & stem. The mouth was stem & tooth, the ear was stem & chain, the whiskers were stem and double running, and the claws were satin & tooth.
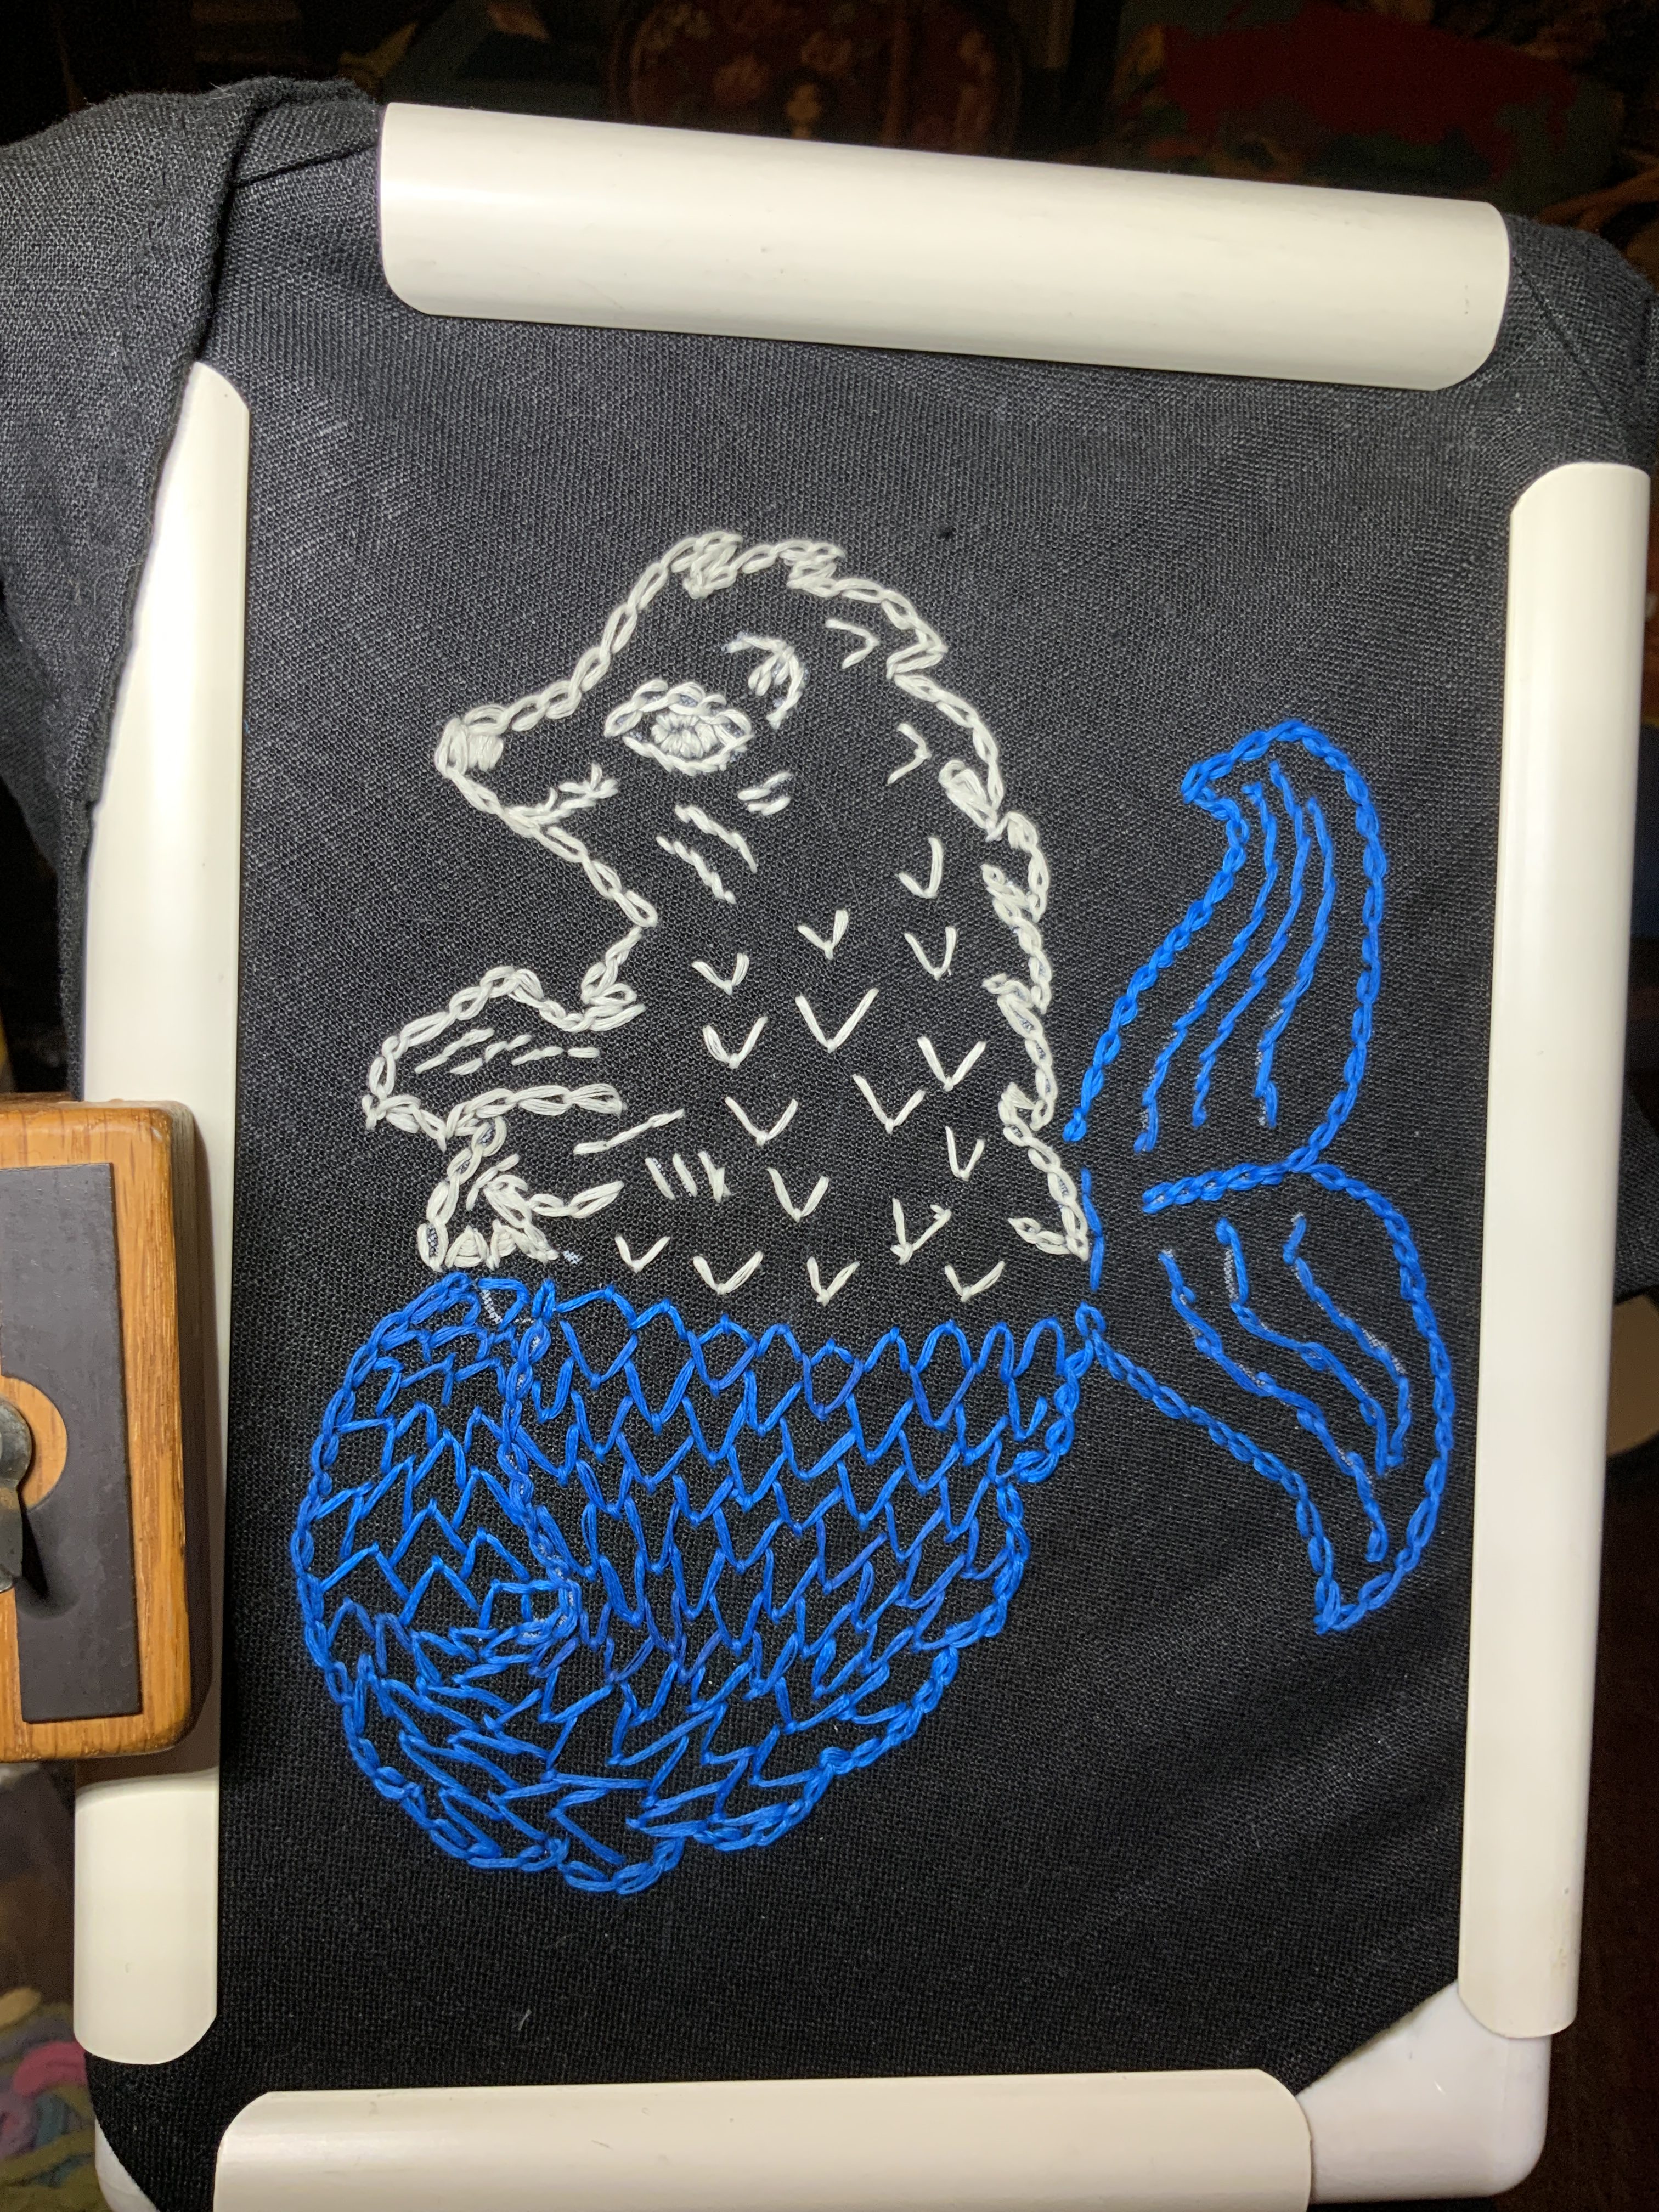
To give the hood a bit more of a ceremonial aspect, and to make it easier for the wearer to find the face opening, I highlighted the face opening outside edge with feather stitch, in argent (same as the sea urchin head & torso): https://www.embroidery.rocksea.org/stitch/feather-stitch/feather-stitch/